Halloween at the Met

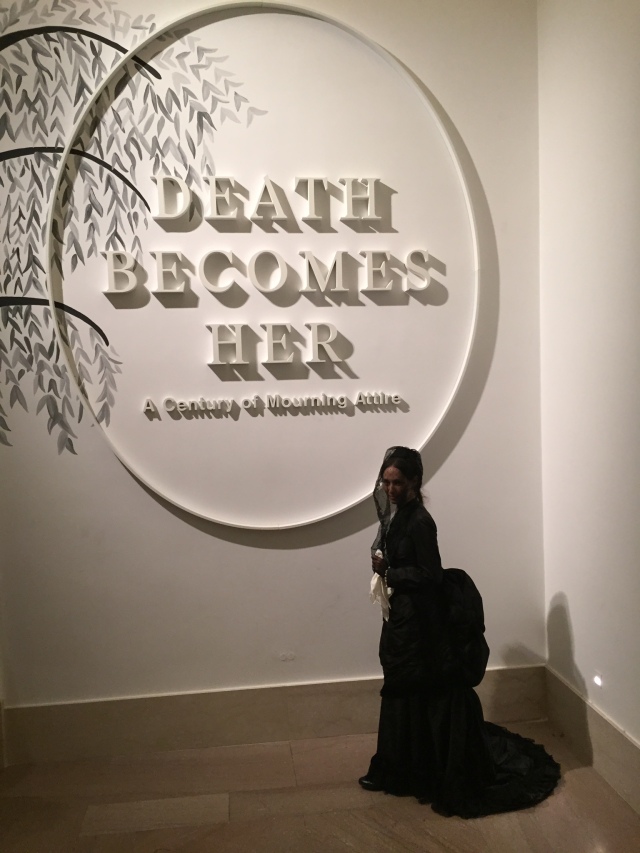
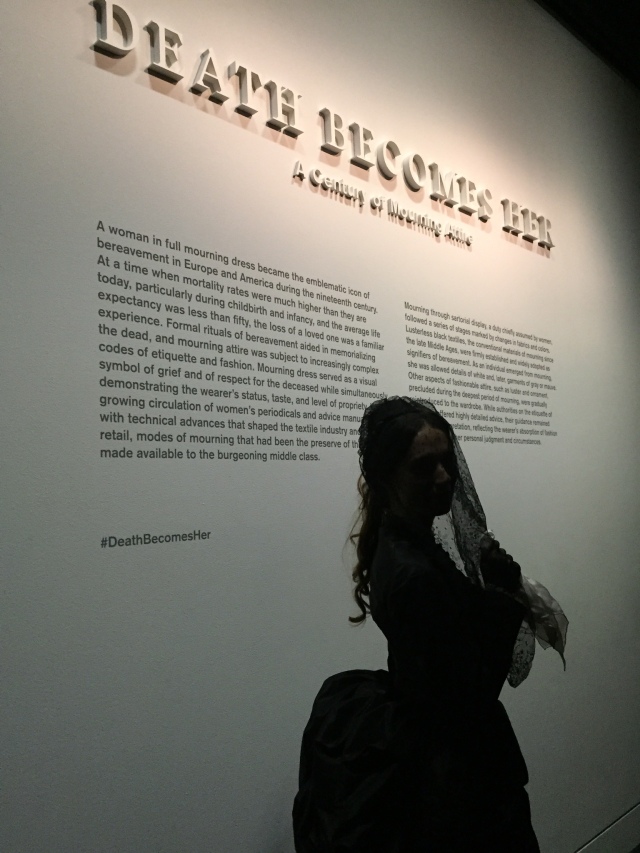
It was a most delightful Halloween this year!  The Metropolitan Museum of Art hosted an event called “Death Becomes You” to coincide with its Death Becomes Her: A Decade of Mourning Attire exhibition.  They invited historical costumers to come dressed in mourning attire and participate in a variety of events. This was truly a special event–so often have we as historical costumers used the Met’s online database for research and inspiration, it felt wonderful to give back in a way!  It is also so rewarding to know that the Met is aware of the work we do and chose to include us in this program.  I am so happy that I was able to fit in some sewing time in the weeks leading up to this so I could participate in the event.

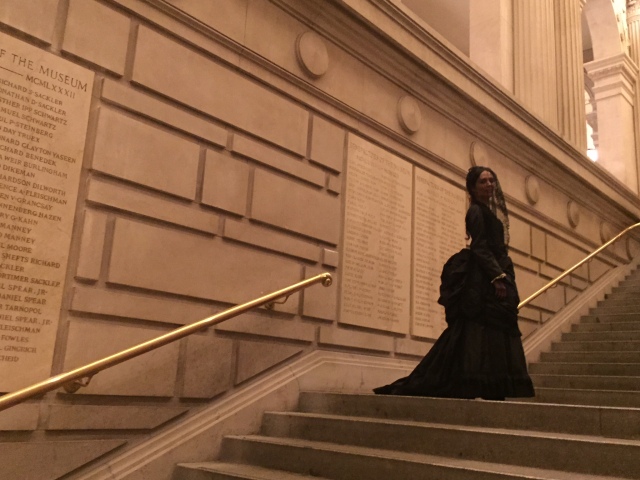
I didn’t have any mourning attire in my costumer’s closet, so I decided to make a bustle dress, since it was an era I hadn’t yet worn.  But mostly, I wanted drama, and 1875 would give me a big poufy bustle, a train, and a veil!  I had some generous yardage of black silk taffeta in my stash, so I just used that up.  Too shiny and lustrous for true, deep mourning, but fine enough for general mourning.

IMG_0139_2

IMG_0118_2 CBS Sunday Morning was doing a program on the exhibition, so the evening started with a fun interview session with Martha Teichner.  Following that, we went down to the exhibition, with CBS filming us along the way.

IMG_0109_2
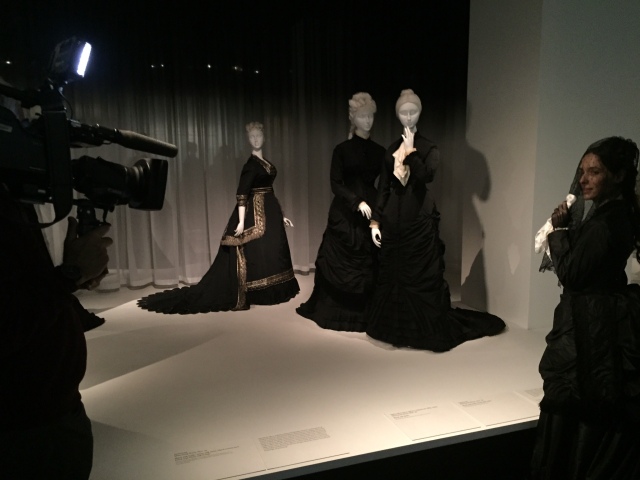
And Bill Cunningham (!!!) was there, too, and took lots and lots of photos of all of us!

IMG_0030_2

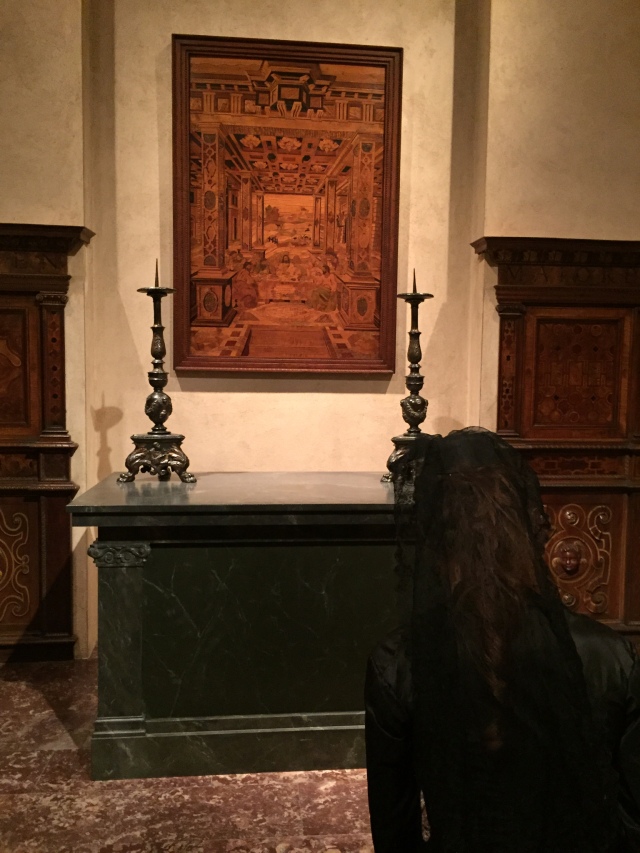
When we were finished viewing the exhibition my husband and I took the rare opportunity for a photo session in a near-empty museum.

IMG_0178_2

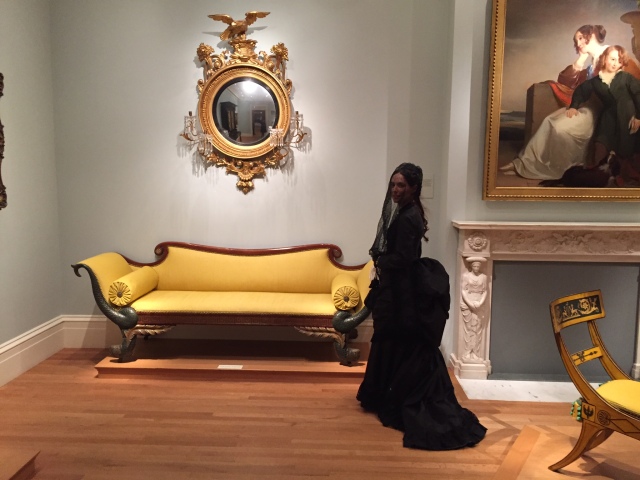
I really wish an 1870s period room had been open to us that night!

IMG_0268

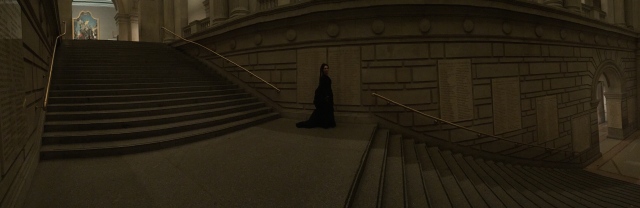
A panoramic in the Grand Staircase

IMG_0239_2 IMG_0328_2

But the fun didn’t stop there!  The producer of the CBS segment called me and asked if I would be willing to come to CBS studios on Sunday morning and dress the set of the show with my costume.  So the Halloween adventure continued!

Early on Sunday morning, CBS sent a car to pick me up.

IMG_0470_2

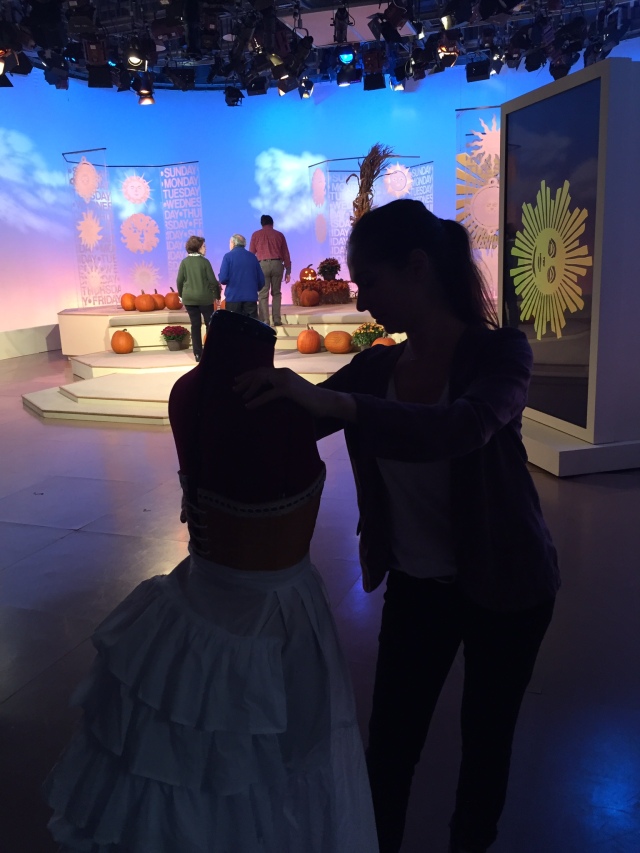
Once I arrived on set, I dressed my form with my corset and bustle.


IMG_0474_2

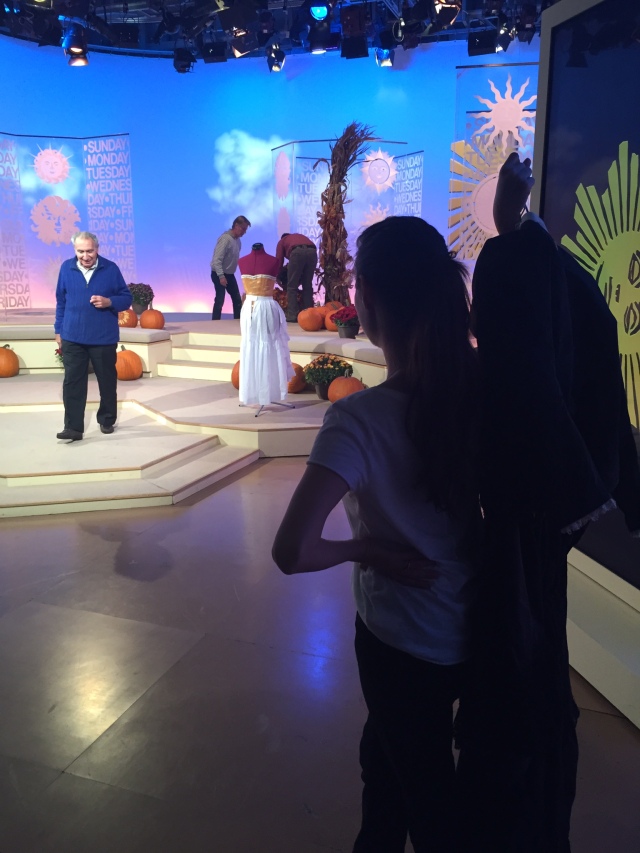
The crew played around with different setup locations for the mannequin.

IMG_0503_2

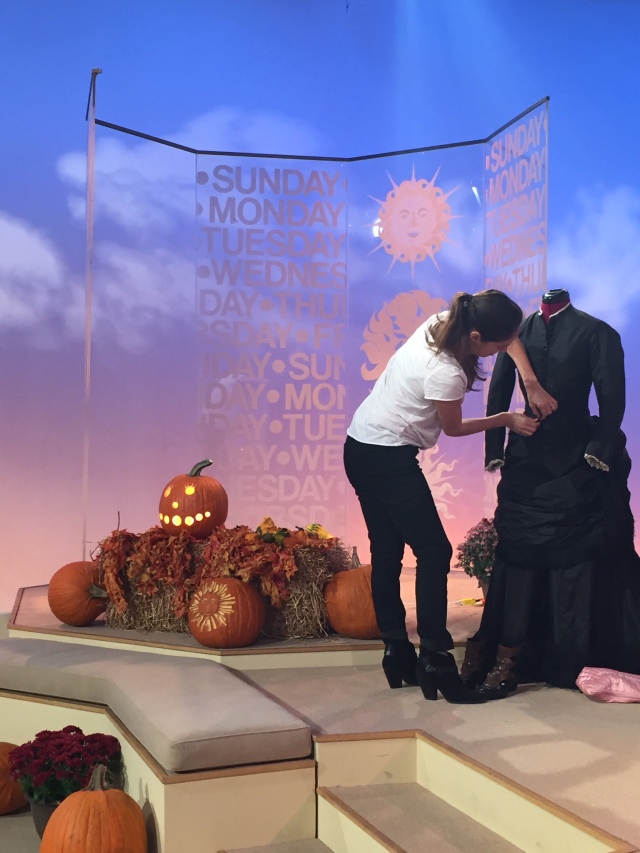
Then it was my turn to dress!

IMG_0441_2

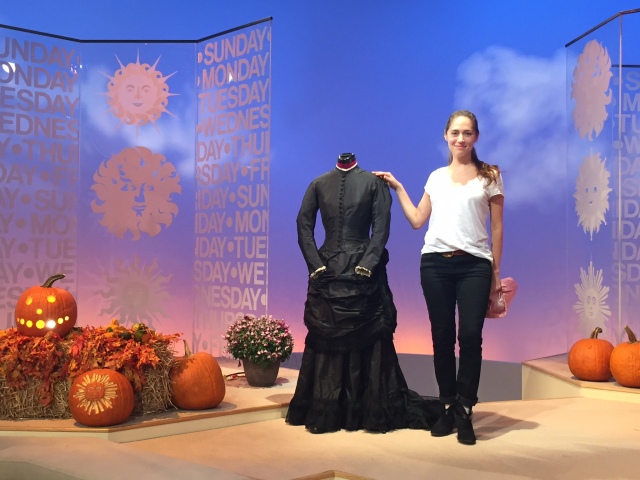
So this was a reproduction costume on a standard sewing form…compared to dressing honest-to-goodness historical pieces on expensive museum mannequins, it was a piece of cake!  But I was thrilled to be able to apply what I’ve learned about museum mannequin dressing to this project.  Unfortunately, the studio shots were not included in the CBS distributed segment clips, so I can’t share that video here.   But you can watch the segment (including a snippet of the costumers’ interviews) here: http://www.cbsnews.com/common/video/cbsnews_video.swf

And the fun didn’t stop there!  Bill Cunningham included photographs of the Met’s mourning revelers in his next collage, and I made the cut (#29)!

It was a fabulous Halloween!

Posted in Uncategorized | Tagged , , , , | 3 Comments

Beetle wing embroidery: the design and accompanying goldwork

When English colonists settled in India and saw the beautiful Mughal court embroideries featuring the wings of jewel beetles, they were captivated by the use of this most unusual material–and beetle wing embroidery became its own “thing.” To traditional Indian embroiderers, however, beetle wings weren’t seen as its own type of embroidery, and it didn’t have a name or any other distinction associated with it. Beetle wings were regarded as simply an extension of metal work embroidery. This is why in surviving examples of Indian beetle wing embroidery, they are without fail accompanied by goldwork.

(On a side note, in the 1851 Great Exposition in London, a Dublin seamstress named Miss Mary West exhibited a beetle wing embroidered dress, which received praise for its lack of accompanying goldwork. Interesting to think that the British had had centuries of opus anglicanum, so the novelty of this style of embellishment was found just in the use of beetle wings.)

Now, as little as I knew about working with beetle wings when I started this, the goldwork embroidery was even more foreign to me.  I used two books to teach myself a little technique: A-Z of Goldwork Embroidery by Kathleen Barac and Helen McCook’s Goldwork.  I enjoy embroidery but I’m not an expert, so I looked for effective ways of laying down metal that would be easy enough to start doing right away with little or no practice.  I decided to play with an assortment of gold purl in various shades and textures and come up with a design that evokes Indian tastes of the nineteenth century, yet was accessible enough to appeal to English taste.

The design of the dress was done in just three motifs: the insects (which I already introduced you to in my previous post), a frond, and a tree of life type of design.

IMG_8574

Insect motif

IMG_8572

Frond motif

IMG_8527

Tree of Life motif

All of the purl used was sourced from Heritage Trading Co. on eBay and the pailettes came from Hedgehog Handworks.  Also, as I prepared the beetle wings for embroidery, I separated the wings that were naturally larger and smaller than the average size so I could play with variations in scale.

IMG_8581

Top, left to right: pearl purl, medium gold, unstretched; pearl purl, medium gold, stretched open; rough purl, ecru; rough purl, ivory; smooth purl, bright gold; smooth purl, medium gold. Bottom, left to right: 3mm gold pailettes, beetle wing, jumbo; beetle wing, average; beetle wing, petite; beetle wing, mini cuts.

For the insect motifs, I used jumbo, petite, and mini wings, plus bright gold smooth purl for the antennae. The technique I used was as follows: I cut two pieces of identical length, brought my needle up on one side where the antenna would end, threaded the purl on the needle, plunged the needle to where I wanted the other end of the antenna to be, and couched the purl into place. I finished off each insect with pailettes.

IMG_8348

IMG_8351IMG_8352 IMG_8354 IMG_8355

The same threading technique was used to outline the fronds, this time in medium gold smooth purl. I wanted it to be very organic and free-hand, and I didn’t care whether or not the fronds were identical to each other. For the frond stems, I used pearl purl, which is stiffer than the smooth purl, so the application is a little different.  I cut a longer length, stretched it open, and couched it down between the twists.

IMG_8346


For the tree of life motifs, I used rough purl in ivory with the same threading technique to create wavy bubbles around the wings.  Then I started to get a little braver in using fancier techniques, using the S-twist stitch found in A-Z of Goldwork Embroidery.  This is a finicky stitch that is easy to execute but even easier to make it look wrong.  I cut hundreds of half-inch pieces of smooth purl in bright gold, but even with a scalpel and a ruler on a cutting mat it was nearly impossible to get them all to an exact measurement.  Any variation on the size of the pieces or the distance between needle points took away from the effect.  Because there were slight differences in the lengths of the purl, I modified the instructions in the book and reversed the direction the purl pieces were laid.  The original instructions had you come up with your needle down where the purl piece was to end, thread the purl, and bring the needle down to meet the last piece in the chain.  My version was to nudge the needle up where the last purl piece ended, thread the purl, then bring the needle down where the purl piece naturally wants to end.

IMG_8452IMG_8453

My S-stitch only came out so-so, but a far more beautiful execution of this stitch can be found at The Unbroken Thread.

And there it is, one full panel!  I have five of these, plus a more elaborate sixth panel that will extend up the entire length up to the waistline.

IMG_8490

This dress has been nearly finished since the end of July, but I’m going to have to wait a little while to bring it across the finish line.  I have other fun projects up my sleeve!

Posted in Sewing Techniques, Uncategorized, Works in Progress | Tagged , , | 6 Comments

Historical Beetle Wing Embroidery

There is nothing like not being able to sew that makes me want to sew!  During the school year, I have precious little time for anything other than work and research, and to add fuel to the fire, all of my work and research involves pretty costumes and interesting time periods that I want to try making.  Last semester, I researched beetle wing embroidery and figured it was about time to make a costumer’s holy grail: a beetle wing embroidered dress.


Untitled

Evening dresses, 1845-1850, English, cotton muslin with beetle wing and metal embroidery. From Cora Ginsburg LLC catalog, 2000, p. 23.

A quick Google search will yield you dozens of amazing beetle wing embroidered garments from the 19th and early 20th centuries, but the ones I decided to use as an inspiration starting point are these two beauties.  I decided on these because I don’t normally do mid-century and don’t have anything 1840s in my closet, and I have a great set of 1850s undergarments that I don’t put to good enough use.  Also, the construction of these magnificent skirts would be in rectangular panels, which would make it easy to embroider.
This is my first attempt at beetle wing embroidery; for more expert advice, you can visit Wormspit or Needle ‘n Thread, both of which lay out a good foundation for me to begin my process.  But I thought I would share my experience as it relates to a historical costumer’s point of view.
I ordered a box of 1,000 beetle wings, or elytra, from eBay, and they arrived fairly quickly.  I was fully expecting to get grossed out by them, but it actually was OK.  They look and feel like fingernails, which makes sense since they are made of chitin.  One thing I noticed is that the package stunk a little bit, so I took my professor’s advice and put it in the freezer for a couple of days just as a precaution.
Untitled2

Jewel beetle

Beetle wings aren’t symmetrical.  These hard outer wings encase a delicate, membranous pair when not in flight.  They meet in a straight line down the “spine” of the beetle and have a slightly rounded outer edge at their sides. Beetle wings are easy to harvest: beetles swarm when they mate, after which they die. Harvesting wings is as easy as sweeping a forest floor for carcasses and the bodies of the insects perish much faster than the elytra.
You can purchase these wings pre-drilled, but I decided to buy them as-is.  I knew I wanted to use wings that were trimmed and shaped, and I knew that I needed at least one more hole, so it just made sense to do it all myself.  The most common shape I’ve seen in historical embroidery is a cleaned up version of the beetle wing’s natural shape, like a leaf, but you can also find historical pieces that use small “chips” of the wing.
2012FF4861_jpg_l

This design is made from beetle wings trimmed to leaf shape. Textile sample, 19th century, India, embroidered plain-woven muslin, beetle wings, couched gold wire and sequins, Victoria and Albert Museum.

S1-270-1

This design uses abstract beetle wing “chips.”  Textile sample, mid-19th century, India, silver, silk, spangles & beetle wings, Victoria and Albert Museum.

The process is fairly simple.  It takes time, but can get relaxing and meditative, like any repetitive task.  I pretty much followed the guidelines from other the other embroidery bloggers I mentioned.
IMG_7053
First I steamed the wings.  They are hard but brittle, and steaming helps soften them a little and prevent them from cracking when you cut them. 
IMG_7054
IMG_7059
Using regular shears, I rounded the bottom edge, which can be particularly tough to get through.  I then evened out the point by trimming the straight side at a slight angle.
IMG_7061
Putting holes in the wings is simple.  I just used a small metal awl and a cutting board as a base and pressed.  I gave the wing a little pivot and it was done.
IMG_7062
IMG_7063
I also wanted to make mini-sized wing shapes, so whenever I found a jumbo wing, I just cut it in half and went from there.
IMG_7051

Left arc: untrimmed wings. Right arc: trimmed wings.

For reference, here are two arcs laid out with elytra: the one on the left is made with untrimmed wings, and on the right they are shaped.  I find the cleaned up version so much more appealing, but the accuracy of size and symmetry really isn’t that important—the slight variations are part of the natural beauty of this type of work.
After trimming a bunch of wings I began embroidering.  I laid out a design based on six 22” panels that will form the skirt. I adore the tongue-in-cheek insect motif, so I began experimenting with those.
I decided to use the same cotton voile from Dharma Trading Co. that I used for my 1806 whiteworked dress; that stuff is divine.  To apply the beetles, I used a green cotton thread, usually just in a V shape at the bottom and top.
IMG_7103
And voila!  One motif down, a gajillion more to go.  I’ll continue the process in another post.  The gold bouillon antennae in this image should give you a clue of what the second part of the embroidery is all about.

Posted in Uncategorized | Tagged , , | 13 Comments

The Little White Dress

There is so much good costume research being done out there!  If you haven’t yet noticed Sarah Lorraine of Mode Historique‘s month-long blog series about the chemise à la reine, fret not: April has just begun.  Every day this month, Sarah will post some a bit of her research on the chemise dress, which makes up her thesis in fulfillment of an MA in Art History.  Just when you think the field of costume history is tapped out, Sarah supports a new theory on its origins.  So far, I’ve especially enjoyed her posts on the chemise à la reine‘s connection to Elisabeth Vigée-Lebrun and Madame Du Barry.  Sarah is also raising funds through an Indiegogo campaign to get to Manchester to study the only extant chemise dress dating to the 1780s.  If you feel so inclined to help out a talented researcher, please do consider paying a visit!

Posted in Uncategorized | Tagged , | Leave a comment

Millinery Through Time in Williamsburg

I’m a researcher.  I’m a costumer.  But a photojournalist I am not.

I do have the best of intentions when it comes to posting on my blog, but I always think I’ll get around to taking pictures later, when I’m at an event, fully dressed up.  But then I get swept up in the moment and photos end up not happening!

I just returned from a fantastic stay in Williamsburg, where I attended the Millinery Through Time conference.  My academic side was so satisfied with all the wonderful presentations.  I feel so inspired to continue with some of my eighteenth-century research!

I also satisfied my costumer side by doing a little dress-up.  There was a costume contest during the opening night reception, so several of us dressed up in our favorite historic dress.  I didn’t get many photos, just a silly selfie and a couple of borrowed images from the web, but I did win the contest!  Holy cow!  I’ve totally leveled up as a costumer now!

photo(6)

A silly selfie with the talented Lisa VandenBerghe.

IMG_7429

And some more silliness posing with a robe a la polonaise created by the Margaret Hunter Millinery Shop, very similar to what I was wearing.

13232350004_4d83e70c49_z

So many power bloggers there! Thanks to A Fashionable Frolick for the photo–seen here with Ashley of A Fashionable Frolick and Aubry of A Fractured Fairytale.

I also wore my new white robe a la francaise on our last night there.  I’m so excited to share some new construction details with you, but it will have to wait.  Just before our photo session, there was a little…accident…involving chocolate pudding on white silk satin…I think the dress will be OK, but a writeup will have to wait!

In the meantime, here is a sneak peek of the dress:

13042659134_31c31d86b8

Thanks to Maggie for the photo, taken at the Francaise Dinner 2014!

Posted in Uncategorized | Tagged , , | Leave a comment

18th century hair! Menswear through the ages!

Happy New Year! I’m on a blessed break between semesters and slowly chipping away at some sewing projects. Nothing to show off yet!

But just because I don’t have something new to share doesn’t mean that I can’t promote the wonderful work being done by two very special researchers. So in case you missed it:

20140102173339-previewKendra Van Cleave’s book on 18th century hair and wigs is on pre-sale! Kendra is a good friend of mine and an extraordinary historical costumer and researcher.  Her new book will provide a detailed overview of men’s and women’s hairstyles from 1700-1799 followed by step-by-step instructions on how to create twenty-five different styles.  Perfect for historical costumers, researchers, and mannequin dressers!  Kendra is self-publishing and could use your support on her Indiegogo site to secure licensed images.  For more information on the book, check out its web page at http://18thcenturyhair.com/.

1864-5_Fall-Winter_Genio-Scott2Another project that should be on your radar is my classmate Chloe Chapin’s new blog on historical menswear.  Ever notice the dearth of information on men’s historical clothing in comparison to women’s clothing?  Chloe has, too, and is striving to fill in that gap–and is so devoted to the subject that she is about to embark on a mission to Sweden on a Fulbright grant to research the history of men’s suits!  Her new site will be a clearing house for other websites dedicated to menswear and will contain information on notable museum exhibitions and an excellent bibliography.  If you or someone you know has a blog on historical menswear, make sure you send it her way, I’m sure she would love to hear from you!

Posted in Uncategorized | 2 Comments

Vintage styling with contemporary clothes

Every December, the MTA rolls out vintage subway cars on Sundays, and you can catch a ride on one along the M line.  This year, I was so lucky to hear about an underground (literally!) party and knew I wanted to join the fun.  I didn’t even bother bringing out any of my early twentieth century costumes because I was still wrapping up term papers due this week.  But I “shopped” my closet and came up with a decent vintage look.

Image

What I’m wearing: JCrew sweater reminiscent of Schiaparelli’s bowknot sweater, Anthropologie’s Train Station skirt, Chelsea Crew oxfords, dark seamed stockings, vintage purse, and a 3-for-10-euros beret bought in Paris.

Image

It wasn’t so cold that day, so I threw on a capelet from New York & Co. for outerwear.  My hair is too long for good vintage styling, so I twisted it in a low side ponytail.

Image

Not too shabby for being pulled together last-minute!

I’m so glad we found the party, which was held at the 2nd Avenue station.  Live music and dancing right on the platform!  An MTA worker was so nice and caution-taped us off but didn’t break up the party at all.

Image

ImageThen the vintage train arrived!  It stayed in the station a few minutes, giving us some photo ops.  The cars I saw were built in the 1930s and the interiors dated to the 1940s.  The ads and posters ranged in date, going as late as the 1960s.Image  ImageImage

Image

Encouraging violence on mass transit. A sign of a different time!

Image

ImageThe whole party moved into the train–including the band, who played throughout the ride.  It was the best crowded subway I’ve ever been on.  Such fun!

Image

You can just make out the scroll of the double bass in this photo.

Image

I hope this party happens again next year!

Posted in Uncategorized | Tagged , | 3 Comments

Exciting Weekend!

On Saturday, I was up in Lowell, MA for the Northeastern Region of the CSA’s symposium, where I presented a paper that is the foundation for my thesis.  My presentation was about…us!

photo copy 7

I’m so happy to say that “Being In Two Places at Once: The Paradox of Authenticity of the Historical Costumer Subculture” was really well received by the academic community.  In my paper, I explored the historical costumer subculture against the paradigm of postmodern fashion theory, raising questions about accuracy versus authenticity.  I couldn’t have done it without all the lovely costumers who so kindly allowed me to use their photographs to illustrate my points…THANK YOU to all of you!

For those who are curious, here is my abstract:

Historical costumers belong to a postmodern subculture comprised of those who engage in the research and creation of historical dress and identify with others who do the same, culminating in various end results such as reenactment, living history, or a simple promenade. Historical costuming is based on two fundamental principals: the imitation of historical fashion and the reconciliation between the present and the past. In their attempt to dress in the style and manner of a bygone era, are historical costumers able to fully replicate the fashion of another time, or does authenticity evade them regardless of their efforts to master it?

Using historical costumers’ self-published websites and blogs, the nature of the subculture is studied against the social and psychological paradigm of postmodern culture. From the construction of the costume to the wearing of the creation, the choices historical costumers make regarding historically accurate materials and construction methods will yield a costume that falls on varying points of the scale between simulation (a faithful copy), and simulacra (a copy for which there is no original). Historical costumers as a subculture have not yet been fully studied in academia, and this research serves to open avenues of research on the subculture, including social perceptions of beauty, aesthetics, and taste; the possible influence historical costuming can have on contemporary mainstream fashion; and how the research performed by historical costumers can have incredible academic value.

Historical costumers toe the line between artificially immersing themselves in a moment in time that is not their own and living in the postmodern present, where the ephemeral quality of fashion can exist across all eras.

I’ll be presenting the same paper this weekend at the LIM College symposium.  If you are near New York City, I’m scheduled to present on Saturday afternoon.

photo copy

Posted in Uncategorized | 3 Comments

Booked!

I just returned from another terrific Costume College.  I’m refreshed and teeming with grand costuming plans for next year!  Write-ups on what I made and wore in the coming days as the photos begin to trickle in.

But until then, I’m happy to plug some speaking engagements I’ve got lined up for the fall:

Thursday, August 8, 6:30 P.M.: An Acquisition of Higher Delight: The Pursuit of Beauty, 1790-1820.  I will be giving a presentation at the Morris-Jumel Mansion on early nineteenth century aesthetics.  This overview on style, cosmetics, hairstyles, corsets, gowns, and accessories precedes a Regency Dance Workshop the following Saturday.

September 28: Costume Society of America Northeastern Region Symposium, Lowell, MA.  I will be presenting my paper Being in Two Places at Once: The Paradox of Authenticity in the Historical Costumer Subculture.

October 5: Fashion: Now and Then: Meaning, Media and Mode, LIM College, New York, NY.  Another presentation of Being in Two Places at Once, this time a little closer to home!

Posted in Uncategorized | 3 Comments

The Strawberry Shoes

IMG_4246

My 18th century shoes had been in a dire situation for a long time! I have a pair of black Fugawees, which I love, but I actually prefer to wear them with everyday clothes than with costumes. I had also tried covering shoes using Loren’s fantastic tutorial and had made two pairs using the Dyeable Grace model, but they are more or less…sloppy. So I knew I needed a beautiful high heel to wear with my pretty new dresses in France.

Then this lovely shoe kept popping up in my Pinterest feed:

c8621a5e3c0590a61f8e046e20d87e90

Shoes, 1740-1760, Hampshire City Council Museum

And I remembered this glorious silk brocade I had seen in the Garment District:

d5e6f8d07640dd5033c666f0a436b50c

And thus, an Evil Plan was born! I once again used Loren’s tutorial, but with much better workmanship this time. For the base, I used a dance shoe from Apple Dance Shoes. The heel isn’t perfect, it’s a little too skinny, but I could always go back and thicken it up with some Sculpey and cover it with fabric. But I’m pretty happy with the results. I just wish I had some honest-to-goodness shiny shoe buckles–those are just oval buckles I found for cheap in the Garment District. The brocade was a beast to work with, as all the fibers making up the strawberry motifs are not secured at all. If I do these again, I might consider stitching around each strawberry to secure them.

But I’m pretty happy!

IMG_4271


Posted in Chateau de Pys 2013 | Tagged | 8 Comments